.svg)


.svg)
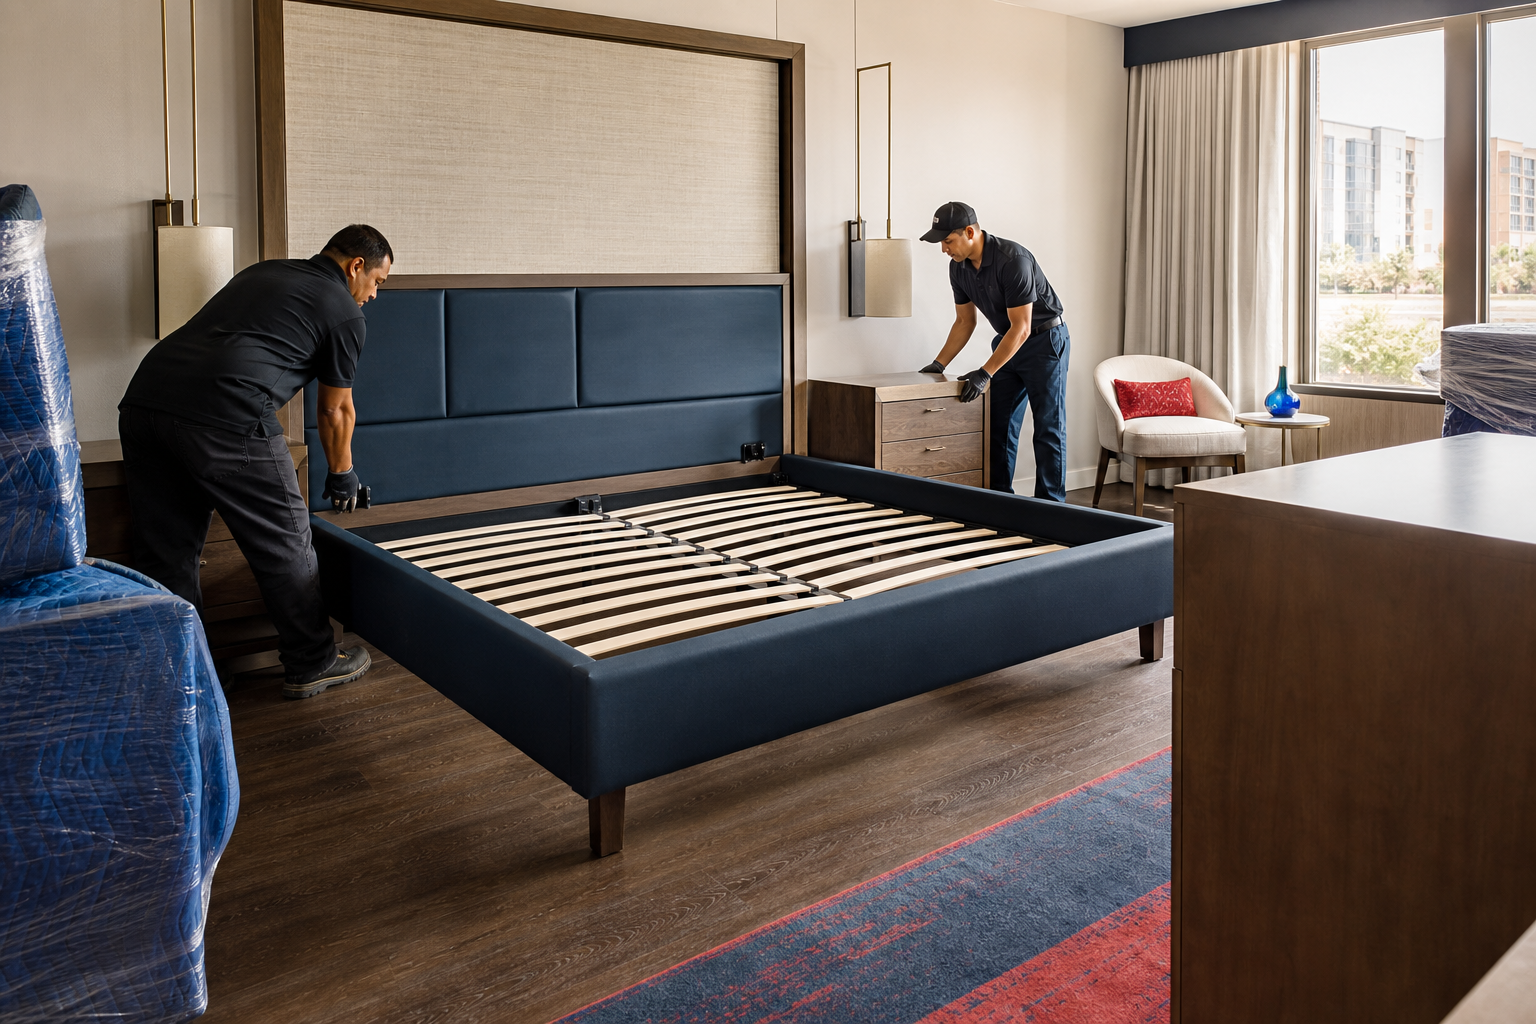
Hotel FF&E installation succeeds or fails at the room level. Beds, casegoods, seating, lighting, mirrors, televisions, safes, window treatments, and other movable furniture, fixtures, and equipment all have to arrive, stage, install, inspect, and turn over in the right sequence, without disrupting construction or hotel operations.
Hotel FF&E installation planning should start with the turnover date and work backward
A hotel installation plan should begin with the required opening, renovation completion, or guestroom turnover date. From there, the project team can work backward through design approval, purchasing, manufacturing, freight, warehousing, floor release, installation, inspection, and closeout. This prevents installation from becoming a rushed final step after earlier delays have already consumed the schedule.
FF&E includes movable furniture, fixtures, and equipment, while OS&E covers operating items such as linens, toiletries, tableware, and uniforms. Permanent building elements, including structural systems, HVAC, carpet, wallcovering, and painted surfaces, are generally outside the FF&E scope. That distinction matters because furniture installers depend on many permanent elements being finished before product enters the room.
Lead times can also shape the installation plan. The model-room process may require 4 to 6 months before broader purchasing begins. Typical lead times may include 12 to 16 weeks for domestic casegoods, 16 to 18 weeks for overseas casegoods, 17 weeks for custom upholstery, and 20 or more weeks for outdoor furniture.
The most useful planning tool is a room-by-room FF&E matrix. This document should connect each item to a room type, floor, room number, supplier, purchase order, finish, expected delivery date, installation status, and responsible party. When maintained carefully, the matrix becomes the control document for receiving, inventory allocation, room kitting, delivery releases, installation tracking, and final sign-off.
A room matrix keeps installation decisions tied to real spaces
Hotel teams often manage hundreds of repeated spaces, but every guestroom still needs individual control. A matrix helps prevent a shipment from being counted as “received” without confirming where each piece belongs. It also gives the installer, procurement team, owner, designer, and general contractor a shared reference when schedules shift.
Warehouse receiving and staging should organize FF&E before it reaches the hotel
Sending every vendor shipment directly to the hotel creates avoidable pressure on the site. A controlled warehouse gives the project team a place to receive products, reconcile quantities, inspect conditions, identify shortages, and hold material until the hotel is actually ready for the relevant floor or room block.
Receiving should record the item, quantity, condition, finish, supplier, shipment, purchase order, and intended property, building, floor, room type, or room number. Products with matching finishes or multiple components should remain together. Casegoods may be kitted by veneer and finish, while fragile or high-value pieces may require custom crating.
Staging is where warehouse control becomes field productivity. Rather than sending mixed cartons and loose items to the jobsite, the team can group product by property, building, floor, wing, room type, room number, project phase, or installation date. This reduces repeated handling and keeps crews from searching through unrelated material in corridors or loading areas.
A room-kit approach is especially useful for hospitality FF&E installation. When the complete set of required pieces is staged together, the crew can verify the room, deliver the kit, install in order, and record completion without losing time to missing components. This method also makes shortages visible before the truck is loaded.
Cross-docking can help when the hotel is ready to receive material immediately but does not have enough on-site storage. The shipment can be inspected, scanned, separated into floor or room kits, and released directly to the installation crew in the approved sequence.
RCS Commercial Moving & Warehousing provides warehouse storage and cross-docking support that can help hotel teams control FF&E before it enters active construction or operating spaces.
Floor releases should confirm the site is ready before furniture is delivered
FF&E installation should be tied to the general contractor’s handover schedule, not treated as a separate delivery activity. A floor may be labeled ready while still having unfinished flooring, paint, millwork, mechanical work, electrical work, cleaning, testing, or punch-list items. Installing furniture too early can damage product and finished surfaces.
Before releasing a floor, the project team should verify that guestrooms are clean, access routes are available, utilities are operational, dimensions match approved plans, and construction obstructions have been removed. The release process should also confirm elevator access, loading-dock appointments, security procedures, work hours, certificates of insurance, floor protection, and the site representative authorized to make decisions.
A practical release checklist keeps the installation team from relying on assumptions. It also gives the general contractor, owner, and installer a clear basis for deciding when a floor, wing, or room block can receive product. The key takeaway is simple: release smaller areas only when the installation path and the rooms themselves are ready.
Guestrooms should be clean enough to receive finished furniture without exposing product to dust, moisture, or construction debris.
Corridors, elevators, and loading paths should be open, protected, and sized for carts, crates, and large casegoods.
Flooring, painting, and relevant millwork should be complete before loose furniture is placed.
Final electrical, technology, AV, and low-voltage work should be coordinated so furniture placement does not conflict with other trades.
The site representative with authority to approve field decisions should be identified before crews begin.
Installation usually follows the construction sequence. Fixed or built-in elements come first, followed by large casegoods and beds, then accessories, soft goods, artwork, lighting, mirrors, and final adjustments. This sequence reduces rework and helps protect installed items from later trade activity.
A model room establishes the standard before repetition begins
A model room or mock-up should be installed and approved before the standard is repeated across the property. The owner, designer, brand representative, general contractor, and installer can confirm furniture placement, clearances, finishes, mounting methods, accessibility requirements, and the expected quality standard. That approval reduces uncertainty before hundreds of rooms are installed.
Room-by-room sequencing keeps crews productive and protects hotel operations
The preferred sequence for many hotel projects is a mock-up room, sample floor, standard guestrooms, suites, public areas, back-of-house or function spaces, and room-by-room punch-list closeout. Suites and specialty spaces typically take more time because they contain more customized furniture, stone, artwork, technology, and design interfaces.
Each room should be treated as a controlled installation unit. The crew delivers the room kit, verifies the room number and layout, installs large items first, assembles smaller components, positions furniture according to approved plans, secures wall-mounted items, adjusts alignment, removes packaging, and records completion status.
This room-by-room discipline is especially important during renovations. Operating hotels may need to preserve guest circulation, limit noise, protect housekeeping routines, manage security, and keep unaffected areas open. Phased work by floor, wing, room block, or scheduled outage allows the hotel to maintain operations while installation crews work in controlled zones.
Elevators and corridors require particular control because they are shared by FF&E crews, construction trades, hotel staff, vendors, and sometimes guests. A site plan should reserve service-elevator windows, define loading and unloading routes, separate guest and back-of-house traffic, establish maximum cart or crate sizes, and specify who installs and removes temporary protection.
Public areas usually benefit from later scheduling, after most guestroom movement has stopped. Lobbies, restaurants, bars, meeting rooms, and other guest-facing spaces often need tighter coordination around inspections, opening events, photoshoots, and active hotel operations. Off-hours or low-occupancy work may reduce disruption when those spaces cannot be closed for long periods.
Protection should remain in place until review is complete
Protection should cover finished floors, stone and wood surfaces, corridor walls, elevator interiors, door frames, decorative wall panels, corners, and public-area finishes. It should remain in place until construction traffic, final cleaning, inspection, and owner or brand review are complete. Removing protection too early can create avoidable damage at the end of the project.
Damaged, missing, delayed, or incorrect items need a documented exception process
Even well-planned hotel furniture installation can encounter exceptions. Products may arrive damaged, hardware may be missing, freight may be delayed, finishes may be incorrect, or items may be allocated to the wrong room. The goal is not to eliminate every surprise, but to prevent one exception from disrupting the entire floor.
Every shipment should be inspected before installation, with discrepancies recorded at receiving and again when room kits are opened. The record should identify the item, room, purchase order, supplier, condition, photographs, packaging condition, likely responsibility, and required disposition. This level of documentation helps assign responsibility accurately.
Common exceptions include transit damage, site damage, missing hardware, short shipments, incorrect finishes, wrong room allocations, incomplete assemblies, defective components, and delayed freight. A professional team should distinguish supplier or transit damage from damage caused after delivery or by jobsite conditions, since the repair, claim, or replacement path may differ.
Damaged or incorrect items should be tagged and quarantined rather than installed without authorization. Missing proprietary components should be escalated for replacement or disposition. Installers should not substitute parts, modify high-value furniture, or alter approved designs without written approval.
An exception log gives the team a way to keep moving. It should track the responsible party, priority, requested action, replacement or repair date, temporary workaround, and effect on room turnover. Crews can continue installing unaffected rooms or components while procurement, suppliers, and ownership resolve open issues.
Delayed shipments should trigger revised release plans, supplier escalation, warehouse checks, and room prioritization. Essential items can be prioritized for rooms needed for inspection or opening, while incomplete rooms remain clearly identified in the installation matrix. That prevents a room from being mistakenly reported as ready.
Punch lists and turnover should connect installation quality to the opening schedule
Punch-list work should begin at the room level instead of waiting until the entire hotel is complete. A room is not ready simply because furniture has been placed. It should be checked against the approved layout, item matrix, brand standard, finish schedule, and functionality requirements.
Typical punch-list findings include misaligned doors and drawers, loose or missing hardware, damaged surfaces, incorrect furniture, incomplete assemblies, unlevel beds or tables, unsecured mirrors or televisions, lighting problems, silicone or touch-up requirements, cleaning deficiencies, and missing accessories. Capturing these issues early gives the team more time to correct them before turnover pressure increases.
A strong punch-list workflow is specific enough to drive action. It should identify the room, deficiency, photograph, responsible party, corrective action, target date, completion date, and approving stakeholder. Installation supervisors can inspect completed rooms, assign corrections, and obtain sign-off from the general contractor, designer, owner representative, brand representative, or hotel operator.
Final inspection should confirm that all FF&E is present, correctly located, secure, aligned, clean, functional, and free from installation damage. Documentation may include completed room matrices, receiving records, damage reports, replacement status, photographs, delivery sign-offs, warranty information, spare-parts records, and unresolved-item registers.
Guestroom turnover should be tied to construction, commissioning, inspection, housekeeping, training, soft-opening, and guest-arrival schedules. Only rooms with closed or formally accepted punch lists should be released as turnover-ready. Rooms with approved temporary exceptions should remain separately identified until replacement, repair, or final acceptance is documented.
For multi-property programs, this same discipline becomes even more important. A master schedule should identify each hotel, building, floor, wing, room block, installation window, warehouse release, crew assignment, site contact, and turnover milestone. Property-specific execution plans can then account for brand standards, access rules, occupancy constraints, and renovation phasing.
If your hotel project needs coordinated storage, logistics, installation, or commercial moving support, RCS Commercial Moving & Warehousing can help plan the work from warehouse receiving through room turnover. Request a Quote or call us today at (804) 358-4035.