


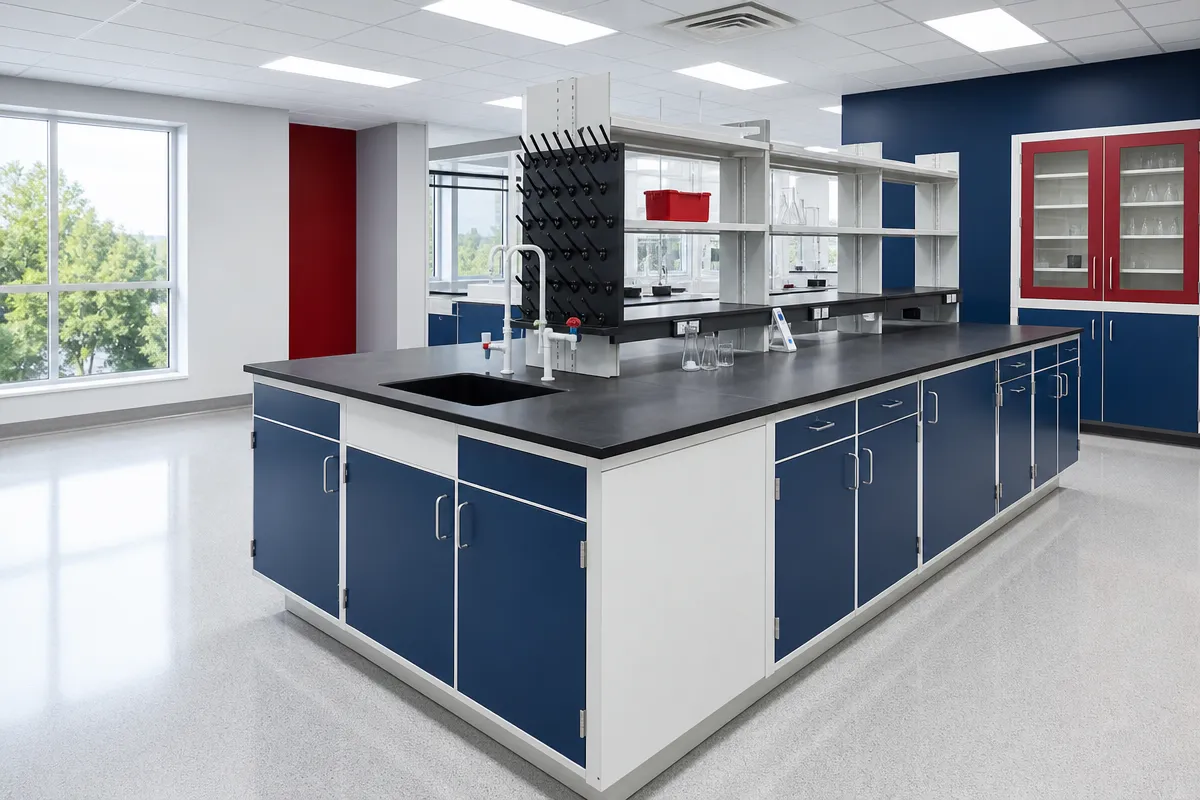
Lab furniture installations work best when treated as part of a larger laboratory move, renovation, or build-out, not as a simple delivery of benches and cabinets. Receiving, staging, room release, utility coordination, anchoring, and final acceptance can determine whether a research workspace opens smoothly or is delayed by rework.
At RCS Commercial Moving & Warehousing, we support commercial moving, storage, logistics, and installation needs for organizations across Virginia and North Carolina, including laboratories, universities, healthcare-related environments, research facilities, and other specialized workplaces.
If you have questions about planning a lab move or installation project, reach out to our team through our contact page.
Successful Installation Starts Before the First Shipment Arrives
The installation process begins long before crews place the first cabinet. A controlled receiving plan keeps laboratory furniture, fixtures, and equipment organized from the moment they arrive. Without that structure, project teams can lose time searching for missing parts, sorting mislabeled components, or discovering shipping damage after the installation window has begun.
Before deliveries start, the project team should establish purchase-order records, packing lists, delivery appointments, room assignments, equipment identifiers, handling requirements, and responsibility for damaged-goods claims. RCS can support receiving, inspecting, inventorying, storing, assembling, placing, installing, and coordinating final delivery of FF&E as part of laboratory furniture projects.
Each shipment should be checked against the approved furniture schedule. Visible damage, moisture, missing components, incorrect quantities, and discrepancies should be documented immediately. Sensitive instruments, casework, worktops, sinks, hardware, shelving, and accessories should be photographed, tagged, and entered into inventory control before they move into storage or to the jobsite.
Storage is especially useful when a lab is not ready for installation. Construction delays, restricted access, phased renovations, or incomplete rooms can all make immediate delivery risky. RCS offers warehouse storage for commercial furniture, equipment, shelving, and supplies, helping materials remain protected until destination spaces are ready.
Cross-docking may fit when materials arrive close to the installation date. Incoming items are checked, sorted by room or installation wave, consolidated with related components, and moved quickly to outbound delivery instead of long-term storage. The goal is to reduce handling while preserving item identity.
A strong receiving plan keeps related components together. Base cabinets, wall cabinets, countertops, sinks, end panels, fillers, service accessories, and hardware should not be separated in ways that slow installation. The earlier inventory is organized by room and sequence, the easier it is to keep the project moving.
Room Readiness Should Control Delivery Timing and Pre-Installation Staging
Lab cabinetry and benches should not arrive in a room simply because the planned installation date has arrived. The better standard is room readiness. A room-release gate should confirm that the space is ready for furniture, access is clear, and the latest approved drawings match field conditions.
Casework should generally follow completed rough-ins, finished and cured surfaces, required inspections, and utility testing that could otherwise require walls or floors to be reopened. A checklist for laboratory furniture installation identifies room readiness, field dimensions, utility rough-ins, finished surfaces, access routes, staging areas, and current drawings as items to confirm before installation proceeds.
Pre-installation review should compare the furniture plan with actual room conditions, including dimensions, wall conditions, penetrations, obstructions, door clearances, elevators, delivery paths, and staging zones. Utility stub-outs and support points should correspond to the furniture being installed, not to an outdated drawing set.
Staging is where planning becomes visible on the jobsite. Materials should be organized so crews can install in the correct sequence without repeatedly handling the same items. Poor staging can create congestion, increase damage risk, and force installation teams to work around misplaced components.
Before furniture is released into a lab area, the project team should confirm practical conditions that protect active laboratory operations, finished surfaces, and sensitive materials already on site.
Field dimensions and room layouts have been checked against the approved furniture plan.
Utility rough-ins, support points, and penetrations align with the furniture being installed.
Finished surfaces are ready, cured where required, and protected from damage.
Access routes, elevators, loading areas, and staging areas are available during the approved window.
Required inspections and utility testing have been completed or formally coordinated.
Staged components are grouped by room, elevation, sequence, and crew assignment.
Emergency egress, fire equipment, occupied circulation routes, clean areas, and active lab operations remain clear.
Delivery timing should also consider equipment sensitivity. Instruments should arrive only after supporting benches, power, gases, exhaust, data, environmental controls, and access conditions are ready or formally coordinated. Furniture often becomes the operating platform for instruments, so placing equipment before furniture is ready can create avoidable rework.
Room Sequencing Reduces Disruption During Laboratory Installation Projects
Room sequencing should follow readiness rather than convenience. In a laboratory setting, the easiest room to reach is not always the right room to release first. A practical sequence confirms construction completion, utility verification, inspection approval, access clearance, and protection measures before installation crews enter.
This approach helps avoid rooms with unfinished floors, open ceilings, incomplete utilities, or unresolved punch items. It also reduces repeated movement through occupied areas, especially near active research, storage areas, or sensitive environments.
For occupied laboratories, installation often works best in waves. Teams may begin with vacant rooms, back-of-house areas, storage rooms, or completed zones before moving into active research spaces. Later phases can be coordinated around temporary barriers, shutdown windows, contamination controls, and user communications.
Sequencing by floor, wing, laboratory suite, or utility zone can also limit disruption. The goal is to create clear boundaries between spaces under construction, spaces being installed, and spaces still in operation. Documented handoffs make those boundaries easier to understand.
A room handoff should include more than verbal approval. Each released room should have an assigned status, responsible party, approved access window, delivery restrictions, required personal protective equipment, and defined acceptance condition. For research and compliance-sensitive areas, handoffs may also address vendor supervision, calibration checks, gas or liquid disconnection, vibration controls, cleanroom procedures, or hazardous-material controls.
Furniture installation should usually precede final placement of sensitive instruments when the furniture supports equipment operation. A comparable campus move sequence includes facilities readiness, furniture installation, network validation, equipment placement, IT connection, application testing, and user acceptance. The same logic applies to laboratory installation because benches, cable pathways, power, and room infrastructure need to be ready before instruments are recommissioned.
RCS supports laboratory relocation planning, specialized handling, secure transport, warehouse storage, cross-docking, logistics, and installation coordination. In a lab move or build-out, those services fit around the physical movement, staging, furniture placement, and installation support that help the broader project sequence stay organized.
Utility Coordination Determines Whether Lab Benches and Cabinets Function Correctly
Laboratory furniture is closely tied to building systems. Benches, cabinets, worktops, sinks, service turrets, shelving, and overhead storage must coordinate with power, data, water, drains, specialty gases, compressed air, vacuum, exhaust, ventilation, fire protection, and other systems.
Destination planning should verify utility locations, bench loads, ventilation connections, furniture placement, and casework layout before equipment arrives. This prevents informal field adjustments that conflict with approved drawings or create access problems after occupancy.
Bench and cabinet placement should preserve access to shutoff valves, electrical panels, plumbing cleanouts, exhaust connections, service chases, and maintenance zones. If a cabinet blocks a valve or a worktop conflicts with a service connection, the issue can affect maintenance, safety, and future operation.
The installation team should verify that utility stub-outs and support points match actual furniture dimensions and configuration. Responsibility for final hookups, trim, sealants, anchorage, and startup tasks should be assigned by name before work begins. That clarity helps prevent gaps between the furniture installer, general contractor, mechanical contractor, electrical contractor, laboratory planner, and equipment vendor.
Equipment placement adds another layer of coordination. High-value instruments may have manufacturer requirements for vibration, temperature, humidity, leveling, power quality, gas purity, exhaust, or clearance. RCS recommends inspecting instruments on arrival, unpacking and installing them according to manufacturer instructions, recalibrating them, and verifying operation before acceptance.
Utility coordination should stay connected to the latest approved drawings. Installation, utility, and contractor drawings should use the same revision so crews do not install furniture from outdated information. Field changes should be documented and communicated before surrounding work makes correction harder.
Anchoring, Leveling, and Placement Protect Long-Term Laboratory Safety
Anchoring and leveling are core installation steps that affect stability, safety, equipment performance, and daily use. Base cabinets, benches, shelving, and worktops should be adjusted to provide continuous support, proper door and drawer operation, accurate countertop joints, suitable drainage at sinks, and stable work surfaces.
Uneven floors or walls should be addressed with approved leveling methods rather than hidden makeshift packing. If cabinets rock, shelves shift, or countertops lack support, the issue should be corrected before acceptance. Small alignment problems can become larger operational problems once equipment, supplies, and users enter the space.
Tall cabinets, wall cabinets, shelving, and other potentially top-heavy components should be anchored to suitable structural surfaces. Laboratory furniture guidance identifies seismic anchorage as an early design consideration and notes that the architect, structural engineer, or installer should confirm anchoring methods for specific walls and floors.
Anchorage should account for substrate, cabinet loading, seismic requirements, pull-out forces, adjacent utilities, and manufacturer instructions. Fasteners should not damage concealed electrical, plumbing, gas, or structural systems. Where wall construction cannot support the load, the project should provide backing, blocking, floor anchorage, bracing, or another engineered solution.
Placement must also support lab operations. Cabinets and benches should not interfere with clearances, maintenance access, doors, drawers, utility access, or circulation routes. Worktops, sinks, shelving, pegboards, and service components should align with approved drawings, not improvised adjustments made under schedule pressure.
A final safety check should confirm essentials before room turnover. The team should look beyond whether the furniture appears complete and verify that it is stable, usable, and coordinated with adjacent systems while crews and materials are still available.
Cabinets, benches, and shelving do not rock or shift under normal use.
Doors and drawers open, close, and align correctly.
Shelves are secured and appropriate for their intended placement.
Countertops are supported, joined correctly, and protected at exposed edges.
Sinks and related surfaces support suitable drainage and sealing.
Anchors, trim, sealants, and final hookups match the assigned installation scope.
Utility connections do not impose stress on furniture, piping, or adjacent components.
These details should be explicit in the installation scope. If anchoring, leveling, sealants, trim, and final hookups are only assumed, they can become disputed extras at the end of the project. Clear responsibility supports a cleaner handoff.
Punch Lists and Walkthroughs Turn Installation Into Documented Quality Control
A laboratory installation should end with a room-by-room inspection, not a quick visual review from the doorway. The punch list should identify missing or damaged components, incorrect cabinet locations, misaligned doors, incomplete hardware, countertop defects, unsealed joints, inadequate anchorage, leveling problems, utility conflicts, labeling issues, and debris that needs removal.
Each punch-list item should include a precise location, photograph, responsible party, priority, corrective action, and target completion date. Categorizing issues by safety, functionality, appearance, documentation, and owner training helps the team correct critical laboratory risks before cosmetic items.
The final walkthrough should include the owner, facilities representative, installer, general contractor, laboratory planner, and relevant utility or equipment vendors. Together, the team should compare the completed installation with approved drawings, verify room sequencing handoffs, inspect anchorage and leveling, confirm clearances and access, and review doors, drawers, sinks, fixtures, shelving, and service components.
Acceptance should occur only after corrective work is verified. Closeout documentation should include updated room inventories, photographs, warranty information, manufacturer instructions, as-built markups, calibration or recommissioning records where applicable, and written confirmation that punch-list items are complete.
This documentation turns installation into quality control. It also creates a clearer record for facilities teams that will operate and maintain the space after the move or build-out is complete.
RCS’s work in transportation, logistics, supply chain, storage, warehousing, installation, kitting, project management, rigging, machinery moving, and laboratory moves is reflected in its listed commercial capabilities on RCS Commercial Moving & Warehousing. For lab furniture installations tied to a relocation, renovation, or build-out, the practical goal is always the same: move the right items to the right rooms, in the right order, with the right controls in place.
If your organization is planning a lab move, laboratory furniture installation, or research workspace build-out, RCS can help coordinate the moving, warehousing, logistics, and installation support around your project plan. Get a Quote, Call us today at (804) 358-4035, or Email us at contact@rcsmoving.com.